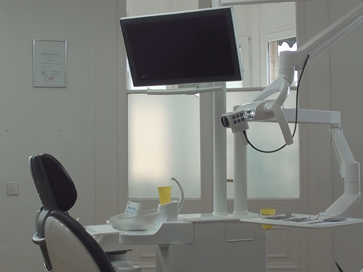
The installation of a ThirdEye dental camera
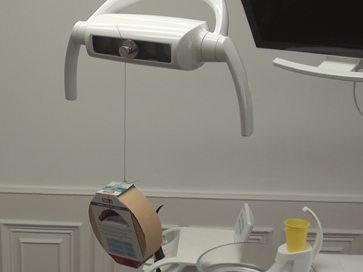
Our dental camera on your dental light
Mounting the miniature camera mount
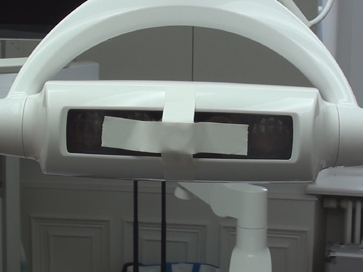
Independently of the type of your dental light the miniature camera stand is stuck on the center of the dental light front. Before glueing the miniature camera stand to your dental light all the adhesive surfaces of both the dental light and the stand baseplate must be cleaned and degreased with isopropylalcohol and a clean cloth, cotton roll or cotton swab.
For temporary fixation:
You can attach/glue the miniature camera stand to your dental light temporarily with a polyether impression material like Impregum®. This keeps your camera stand in place even for a longer period of time (even months) and can be removed from the dental light without leaving any damage or scratches (do not use any metal tools to remove the Impregum, but only your finger nails ! Using Impregum® as a temporary glue, please secure the camera from falling with a short (steel) line or fishing steel leader.

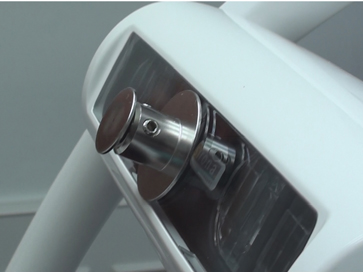
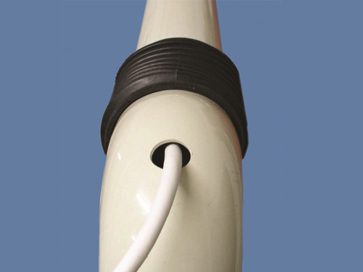
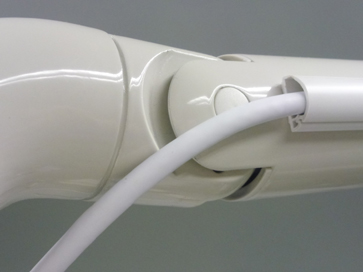
All our cameras are mounted (glueing the miniature camera stand) in the centre of the dental light front. The miniature camera mount consists of a stainless steel ball joint with two fixing screws and a baseplate. The miniature mount weighs about 20 grams.

The miniature camera mount is very small and 30mm in diameter only.
Before glueing the miniature camera mount on your dental light, you need to check, if your dental light can hold the additional weight of our camera. ThirdEyeUNI weighs about 170 grams, ThirdEyeHD and ThirdEyeEVO about 250 grams.
To check the load capacity of your dental light we recommend hanging a weight of the actual camera weight below the dental light head. The dental light tubing should not move downwards nor should the dental light head tilt.
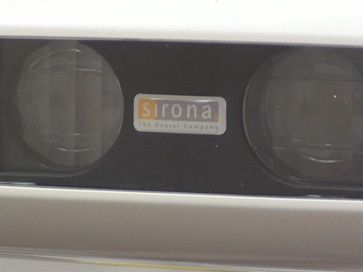
All ThirdEye dental cameras always should be positioned in the center of the dental light front. Only exception: large surgical lights with a handle in the center of the light. These lights have wide working distances (more than 70-90cm) and thus there will be no problem with parallaxis, if the camera is mounted somewhat outside the dental light center. Please see https://en.wikipedia.org/wiki/Parallax
Before glueing the miniature camera mount you need to degrease both the baseplate of the camera mount and the dental light front, where the miniature mount shall be glued on.
Please use isopropylalcohol and a clean tissue, a cotton roll or cotton swab.
Important:
Never use medical hand disinfection, because these may contain lipid balancing substances.
Degreasing the front of the dental light, where the miniature mount shall be glued on. Afterwards dry all the surfaces with a new cotton roll or cotton swab.

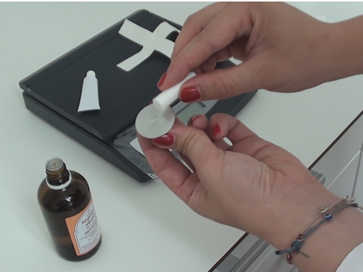
Press a small portion (size of a cherry stone) of Hylosil® silicone glue on the baseplate. For dental lights with a relief on their front side (e.g. old Siemens M1, Sirona E, Pelton Crane etc.) the silicone layer must be somewhat thicker.The thinner the silicone layer, the stronger the adhesive force will be after the hardening of the silicone.
Slightly push the miniature camera stand onto the center of the dental light front and pressed it on until some silicone outpours the baseplate at the edges.
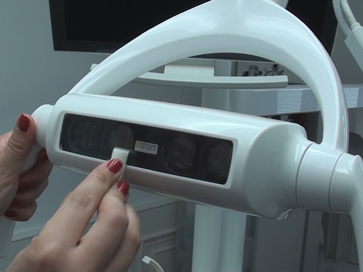
It is important to fix the stand in the correct position, so that the locking screws are well attainable afterwards. With most dental lights it is best the screws show upwards V-shaped. (view: standing in front of the light)
For a good esthetic, please remove surplus silicone around the base plate of the miniature camera stand using a cotton swab or cotton roll.
Now a cross of adhesive tapes is formed to keep the miniature camera in place till the hardening of the silicone glue is terminated.The curing of the silicone takes about 4-12 hours depending upon the thickness of the silicone layer (the thicker the layer, the longer the hardening by precipitation phase will take). The hardening by precipitation can be accelerated however by warmth. For this reason the light should remain switched on for 3-4 hours.
At best you let the hardening terminate overnight.
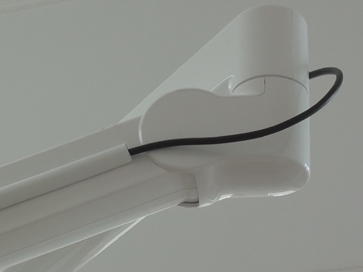
Laying the dental camera cable
With it´s diameter of only 5,6 mm the ThirdEyeSDI dental camera cable can be laid into the tubing linkage of your dental light. The maximum diameter of the cable plug is 12 mm (on the camera side).
Please notice !
For laying the camera cable into the inner tube of the dental light one has to drill a small hole into the front side of the dental light tube (often plastic parts). This bore hole will lead your dental light to lose its registration and warranty (medical products law). We leave it up to you to drill this hole by yourself or have a technician from your dental supplier drill this hole and lay the cable for you. A more comfortable, but maybe less attractive way to lay the camera cable is through the use of cable clamps or better miniature (white) cable tunnels outside along the dental light tubings.
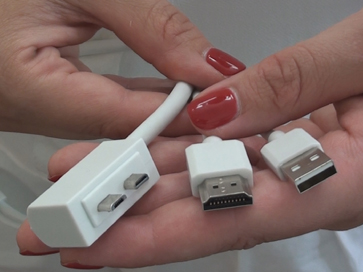
The camera cable of ThirdEyeUNI is 6mm in diameter, but it has a bigger plug on the camera side and a combined USB/HDMI break-out cable on the monitor/ power supply side.
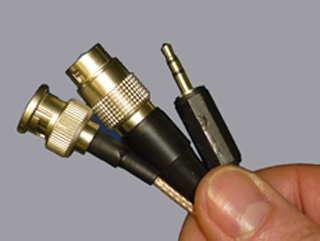
The camera cable of ThirdEyeSDI is white and is 5,6mm in diameter. It has plugs for HD-SDI-video and stereo audio to connect to the SDI recorder and a 12 pin HIROSE plug to connect to the medical power supply. Camera sided there is a 6pin HIROSE connector.
We mostly recommend laying the camera cable using self-adhesive miniature cable tunnels, which have the advantage, that you can exchange/remove the camera cable rapidly or take the camera cable for a seminar outside your office.
Please leave some inches of spare cable around the articulated arms of the dental light tubings.
Important: In order to ensure the full mobility of the light head, a cable reserve must be present. The best way to test the length of the necessary cable reserve is to attach the camera to the stand, connect the cable plug to the camera socket and hold the camera cable to that point, where the cable is to be laid into the light tubing or cable tunnel. Now move the light head to any possible direction. The cable should not be strained in any position nor be in contact to hot surfaces of the dental light.
Note:
The camera cable may be broken when squeezed or be laid in to close bends.
Do not lay any excess camera cable in bends, because this might induce electric interferences (electric inductor coil !)
Connecting the camera to a monitor
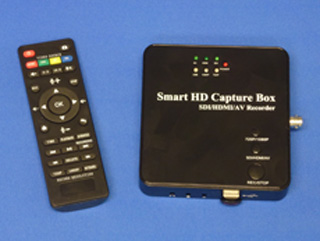
Connecting ThirdEyeSDI directly (without a digital video recorder) to a monitor would require a SDI monitor. These SDI monitors still are rather expensive.Therefore we recommend our SDI digital video recorder, which converts the HD-SDI signal into an HDMI signal. Allmost all monitors today have HDMI-sockets. Since ThirdEye-SDI and ThirdEye-UNI are full-HD cameras, please make sure, that your monitor/tv device can output full-HD format, too!
ThirdEyeUNI is connected to the monitor via HDMI.
ThirdEyeEVO is connected wirelessly to the tablet/IPAD or via MHL to a modern tv monitor.
Attachment of the ThirdEye dental camera
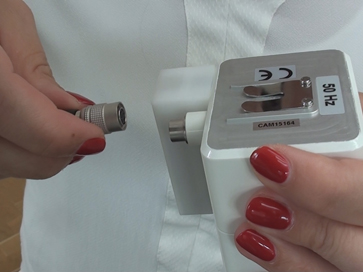
Once the camera cables are laid, connect ThirdEyeSDI to the camera sided 6pin HIROSE cable plug. Since this is possible in one position only, you should turn the camera and cable plug somewhat against each other until the plug engages in the socket.
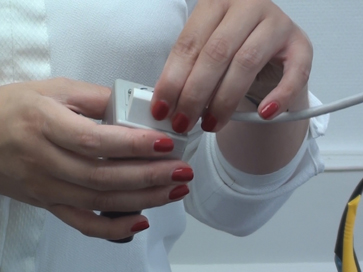
To connect ThirdEyeUNI to the camera cable, please push the combinded HDMI/USB plug in the notch on the rear of the camera housing. Slightly waggle the plug there and back till it engages completely.

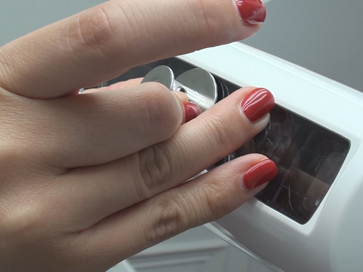
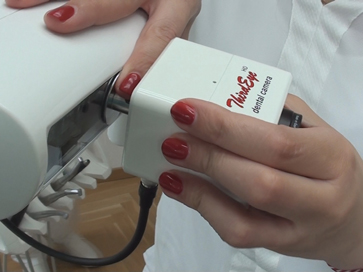
All ThirdEye dental cameras are using the same camera mount. The ThirdEye dental cameras are being slided on the circular head (coin-like) of the miniature camera mount.
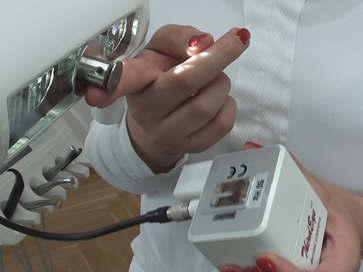
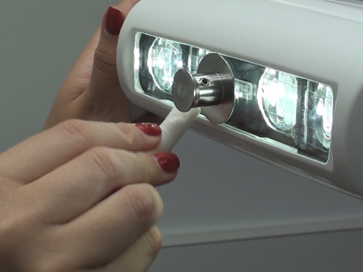
To slide the camera on the mount, use your to index finger pressing against the miniature mount from below, thus stabilizing the dental light.
To remove the camera from the mount lay your index finger on the miniature mount to push your dental light downwards.
Now you can connect the camera to the corresponding medical powers supply.
ThirdEyeSDI needs a 110-240 to 12 volts power supply.
ThirdEyeUNI is connected to a 5 Volt USB power supply.
for next steps please see adjustment of ThirdEye dental cameras
