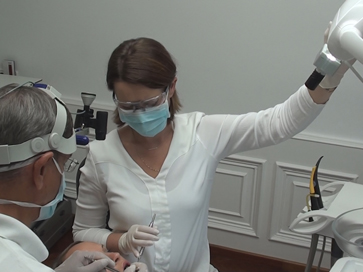
Shooting intraoral videos or photos
please scroll over photos to see a second image
Preliminary facts
Most important:
If the camera does not show a sharp image with auto focus switched on, you should check working distance* !
With close-up-lens #1
ThirdEye-SDI can focus from 45cm - 80cm
With close-up-lens #2
ThirdEye-SDI can focus from 35cm - 60cm
Without any close-up lens
ThirdEye-SDI can focus from 80cm- infinity only.
All thes given working distances are for maximum zoom-in ("tele" mode). In "wide" mode these minimum working distances will differ due to a wider depth-of-focus !
* working distance: distance between patients mouth and camera lens front
Focus and depth-of-field
The depth-of-field of a lens varies with the focal length, the aperture (the size of the opening of an iris or diaphragm) of the iris and the working distance (distance between front lens and object). The depth-of-focus further depends on the illumination of the object to be shot. The higher the brightness (measured in lux) by the dental lamp, the smaller the aperture of the iris (and electronic iris !) can be and the wider the dephth-of-focus shall be.
Focus and lens
As told above depth-of-focus is a function of brightness. Low brightness, narrow depth-of-focus !
Since sophisticated zoom lenses are built of lens-groups with 10 and more lenses alltogether, these lenses need a lot of light, because ever lens "swallows" light on its way passing the light.
Thus a telephoto lens (with just one achromat inside, like our lens in ThirdEye-UNI) might have a better depth-of-focus than even the best DSLR camera zoom lens.
White balance
Another impotant feature of dental cameras is their ability reproducing correct colors. Cameras with automatic white balance systems are often good outside in the nature, but show very bad colors inside the mouth. A lot, if not all sports cameras show this problems.
To reproduce correct intraoral colors, our ThirdEye-HD has a manual white balance. Though having an automatic white balance ThirdEye-UNI shows very good intraoral colors, too (colors also are an issue of monitor color adjustment!)

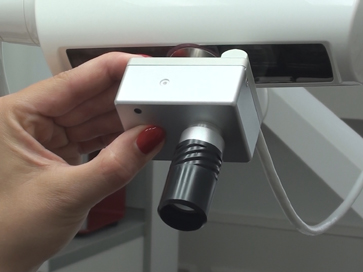
ThirdEye-SDI has auto focus and a 10fold optical zoom lens, which comes with a remote control. So there is no need to touch the camera during denta procedures. Besides the manual white balance, which should be done whenever ambient illumination has changed.
Regarding auto focus, we strongly recommend leaving the auto focus set up all the time.If you have the impression the auto focus is not working, please push the AF button (= auto focus) on the membrane keyboard. 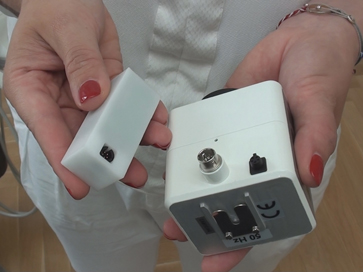
Connecting the zoom remote control (for ThirdEye-HD only).
This step is not necessary for ThirdEye-SDI, because ThirdEye-SDI has the remote control receiver built-in. Connect the camera cable and slide the camera onto the miniature camera mount.
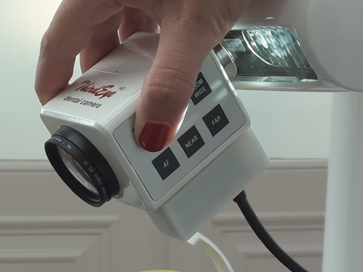
Doing a manual white balance
Switch on the dental light.
In a distance of 30-45cm (10-15 inches) put a matt white sheet of paper or a grey scale in th ebeam path of the dental light and the camera lens. It may be favorable putting the paper on the head rest or in front of the patient´s face, if he/she is already seated.
Push the WB button (WB = white balance) of the membrane keyboard for 3 seconds. The color on the monitor immediately will change to "white" again, according to the changing illumination.
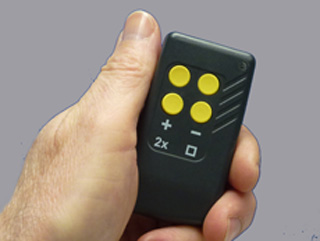
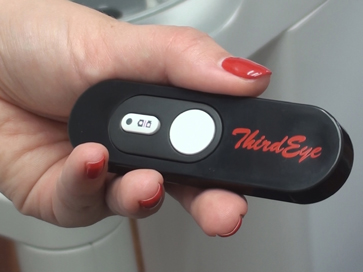
Using the remote control of ThirdEye-SDI
The remote control has four functions:
zoom-in (tele) and zoom-out (wide), 2fold digital zoom and freeze frame.
ThirdEye can be zoomed to depict either the whole surgery room, the patient´s face or up to three teeth format filling on the monitor (the latter at 50cm WD*).
*WD = working distance
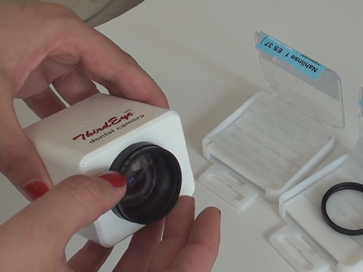
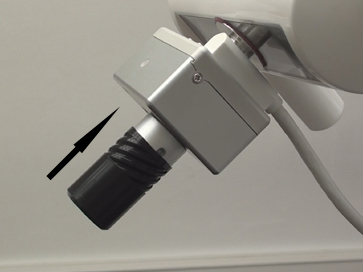
Changing close-up lenses
Without a close-up lens and at the utmost telephoto shot the camera can focus from a distance of 80cm only. To enable the auto focus for closer distances you need a close-up lens.
Close-up lens #1
(mounted) is for workig distances of 45-80cm
close-up lens #2
is for working distances of 35-60cm
To change close-up lens just unscrew it.

ThirdEyeUNI is a all manual dental camera - manual focus & manual zoom.
A small and lightweight camera with a good depth-of-focus
Switching the camera on and off
To switch on the camera push the on/off button for one second. The camera will "beep" once.
To switch off the camera keep pushing the on/off button for three seconds. The camera will "beep" three times and shut off.
Using the remote control
ThirdEyeUNI comes with a two button remote control.
The oval button is for changing modes (video mode - photo mode)
The circular button is for start/stopp video recording and the shutter release for shooting still photos (function of circular button according to the camera mode)
Focussing the camera
ThirdEyeUNI dental cameras have a fixed focal length of f:40mm.
You can focus the camera from 30cm - 100cm working distance (WD)
Focussing is done by turning the outer telescope agains the inner telescope.
The camera has a depth-of focus of about 4-8 cm (dependent on brightness and on working distance).
To keep perfect hygiene, please always use the black autoclavable lens hood.
Focussing, rotating the outer telescope manually, will cause the front lens moving back and forth.I n the backmost position of the front lens you can shoot whole mouth videos and photos at a working distance of 50-60cm.
In the anteriormost position of the front lens you can come as close as 30cm to the patient´s mouth.
"Manual zoom"
ThirdEyeUNI dental camera has no optical zoom !
You can "zoom-in" (tele photo shot) by changing the dental light´s position from far to close and you can "zoom-out" by pushing the dental light more far away (please scroll over image).
We call that "manual zoom", because somtimes it is faster to change dental light´s position than electronically zooming a camera lens.
With the "manual zoom" you can depict either full mouth or up to four teeth format filling on a monitor.
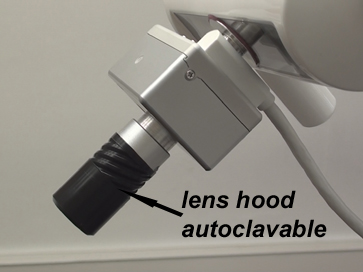
Always using the lens hood
The outer tube of the lens is the only part of the camera to be touched by your or your assistance hands during treatments. To prevent a contamination of the lens, we deliver a special lens protection. This lens hood is made out of polypropylene. This material can be disinfected in the disinfection bath and being autoclaved at 135o Celsius.
The lens hood simultaneously serves as sun shade and ray shade. It prevents other light sources - for example your ceiling light or daylight falling through a window - falling onto the front lens, thus reducing contrast of the system. You can focus the lens with the lens hood in place.
If the lens hood looses grip, just push it together once and it will fit again!
Rotation of the camera (function of all our cameras)
You can rotate all our cameras on the miniature camera stand for about 45 degrees to each side. And the camera will stay in that position ! Thus you always can adjust the lip line or the teeth arch to the horizontal in whatever position the patient´s head or the dental light might be. (scroll over image)
Working with a ThirdEye dental camera
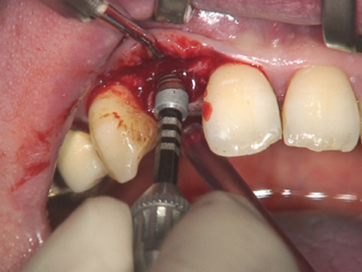 Direct shots
Shooting videos and photos with direct sight on the intraoral subject (tooth, gums,...) is very easy. Just direct the dental light, so that the object you are working on will appear in the center of the monitor.
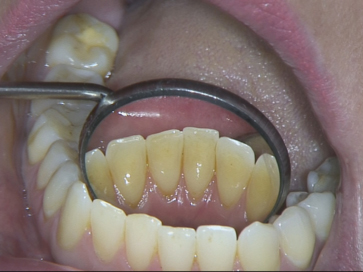
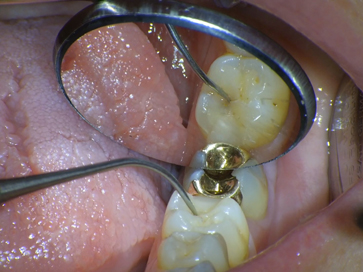 Taking shots with the dental mirror
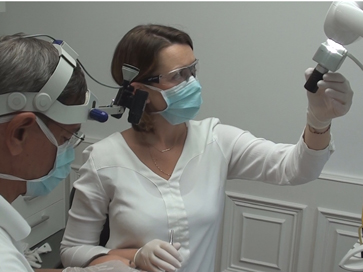
If you want to shoot subjects or tooth surfaces only visible with your dental mirror the light of your dental light should come out of the direction of your head at best. The central beam of the dental light then will be nearly parallel to your visual axis. "What you´ll see in your dental mirror will be what you´ll get" on the monitor screen*.
* provided your dental assistant controls the focus or you are using auto focus

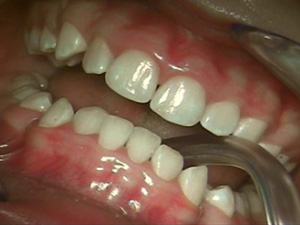
Using the dental mirror to document an entire dental exam
If you want to shoot a video of all teeth (e.g. at a dental exam or for prophylaxis), the dental light should be positioned in the angle bisector of the upper and lower jaw.The dental mirror should be directed towards the dental light in an 45-60 degree angle (angle between tooth row and dental mirror).
Thus you´ll only need slightly moving the dental light some degrees to the right and to the left. All without further movements of the dental light.
Taking shots with a photo miror
Taking shots with a photo mirror confirms to the above rules. The dental light should be positioned directly opposite the patient´s open mouth, composing an angle bisector between the upper an dlower jaw.
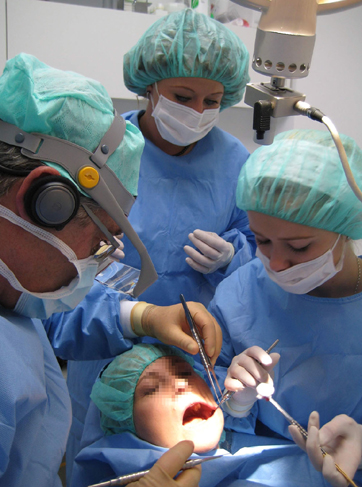
Take your time for a little training !
It is kind of different working with a dental camera shooting video continuously
(e.g. for video/audio documentation or live video transmission)
Requirement #1:
Preventing your head/hands interfering with the beam path of the dental light !
If your head or your hands cast a shadow on an intraoral surface, you will not be able to take satisfying video or photo shots.
And it will take some training trime to be aware of and prevent such mistakes.
On the other hand, if your dental assistant cannot see on the monitor the tooth or intraoral surface you are working on, she/he will know, that there is not sufficient light falling on the working area and will readjust the dental light´s position or tell the dentist to withdraw his/her head (or hands).
And as in real (dentist) life, there will be situations, where it will be impossible seeing anything let alone being able to take a video or photo shot ! Sorry.
All manuals (PDF) can be downloaded form the download menu.
